Pruning a grape vine

Pruning a grape vine – where does is come from and why?

Pruning a grape vine dates as far back as 1876, when French viticulturists trimmed their grape vines to keep them in shape, as they grew older.  They learned that without pruning a grape vine, their grape vines grow out of hand and produce smaller crops, with lower grape quality as years go by.


They developed a pruning method, where only a few old canes are removed during winter to keep the basic structure of the vine under control.  The method or style of pruning a grape vine changed quite a bit since then, but the basics of keeping the structure of the vine as small as possible, remains until today.  However, the most important thing they discovered, is that with pruning a grape vine, it will produce the best crops, EVERY YEAR.


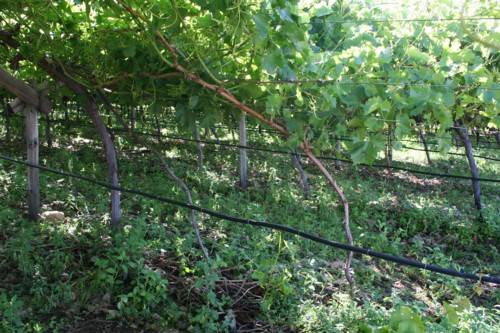
Why?  Without pruning a grape vine, the structure of the vine will get bigger and bigger every year, pushing the most active growth to the very end of the vine.  Have you seen a grape vine climbing up trees? 


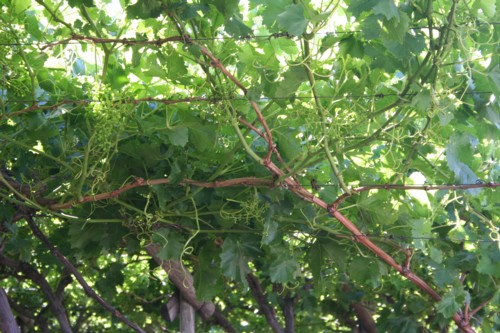
An “out of control” grape vine produce lots and lots of flower cluster, but seldom produce good quality grapes to wine or table grapes and in the end, no grapes at all.


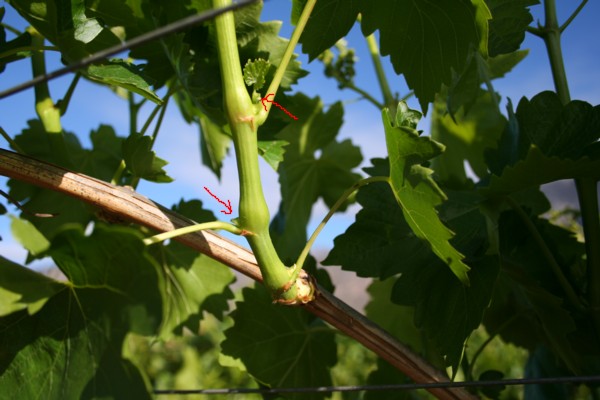
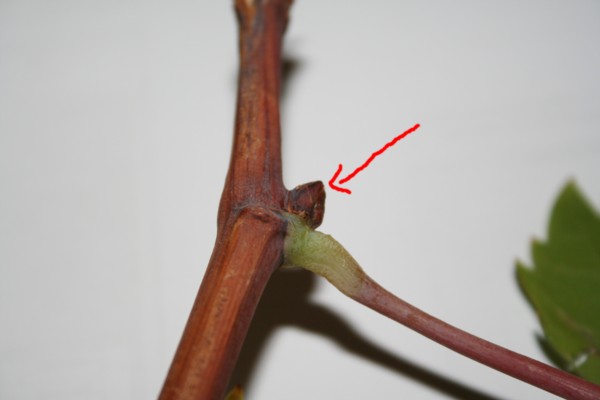
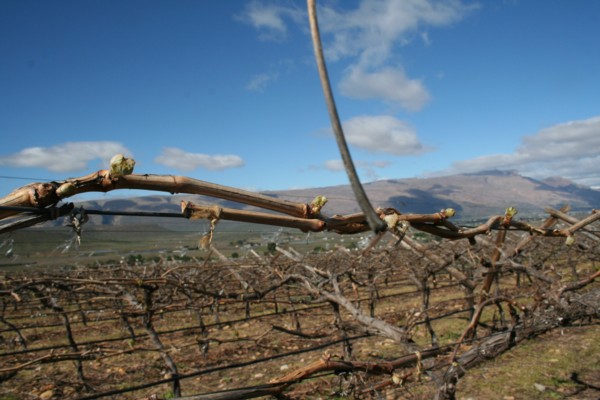
What most new grape growers don’t know, is that a grape vine produce grapes from buds that was laid down the previous year – in other words, the buds on a green shoots during this year’s growing season, will be the fruit bearers for the next season!


Although there are many reasons for pruning a grape vine, the 4 most important one’s are the following:

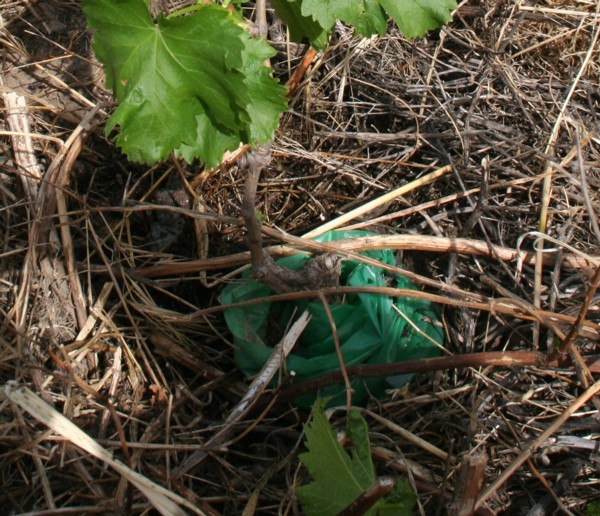
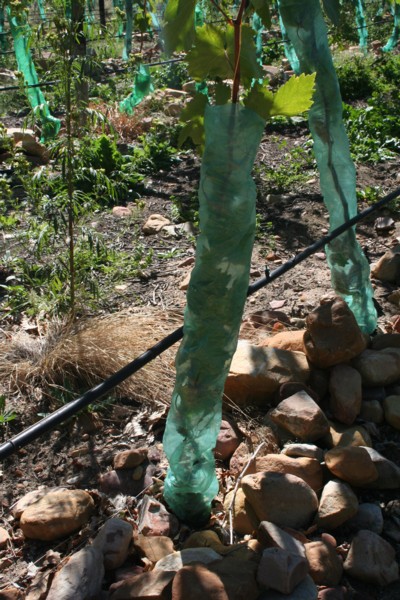
     1.  Pruning a grape vine to develop the young grape vines:   

I cannot stress this enough!  The key to having a productive grape vine one day, starts with the training and pruning of pruning a grape vine.  If you grow grapes commercially like I do, you need to get that young grape vine in production as quick as possible and the only way this can be achieved, is knowing how to prune and train that young vine.


This is really the starting point of having a successful, productive vineyard – no matter if you grow one grape vine or a thousand, it is essential that you prune and train the young vine the correct way.


2.  Pruning a grape vine to maintain a proper balance between growth and fruit bearing: 


Incorrect pruning or even no pruning at all, will result in thousands of buts to open in spring.   At first, this will look quite lovely, but eventually, these new shoots will be under-developed and will for sure produce less quantity and quality grapes. 


What not many grape growers know, is that when a bud open in spring and reveals a new shoot, this shoot grows from food stored in the vine the vine during winter and not from nutrients in the soil.  Only when the shoots are about 2 to 5 inches, the roots of the grape vine become 100% active.  Obviously, the more shoots there are, the less food there is for each shoot to develop during the early stages of shoot development – which by the way is the most important stage and that is why pruning a grape vine is so important!


So you haven’t pruned the vine, and it still produced good shoot length, despite the fact there are thousands of new shoots on the vine.  The next critical stage in the development of a grape vine is flowering and fruit set.  During flowering, the grape vine is under a tremendous amount of stress, as the grape vine needs more and more nutrients to maintain the proper physiological activities within the vine.  Once again, it is quite obvious that the more flowers there are, the less nutrients per flower there is – the result; the grape vine will naturally aborts the flowers to save itself and in the end produce strangely grape clusters with low quality grapes.


      3.  Pruning a grape vine to maintain a proper crop size:

Over-cropping is probably the biggest mistake new grape growers make, as they try to grow as many grapes per grape vine possible.  Over-cropping will not only delay the ripening process by a week or two, but will also influence grape quality.  


The more grapes there are on a single grape vine, the more nutrients and basic elements like potassium is needed to maintain a proper balance between fruit development, fruit ripening and keeping the physiological processes intact – this is also the reason why having too many grapes per grape vine, will result in poor coloring of the grapes.


In the end, to produce insane crop sizes, you need to find the point where your grape vine produce optimum number of grape clusters, without negatively influencing the quality of the grapes and pruning a grape vine is the starting point of proper growth vs crop size balance.


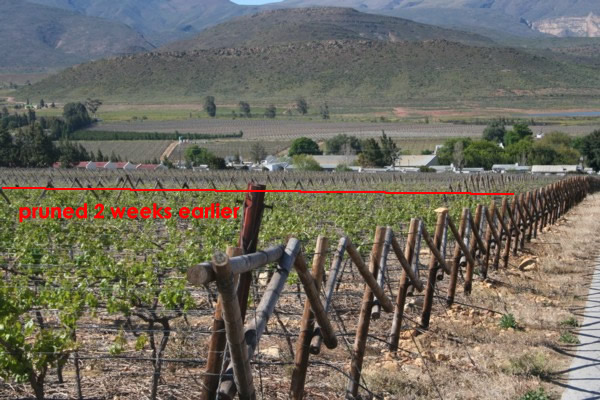
      4.  Pruning a grape vine to maintain a proper grape vine structure:

The last, but for sure not the least reason why we prune our grape vines, is to develop and maintain the structure of the grape vine.


Most grape vines nowadays are grown on some sort of supporting object.  Whether it is a pergola, wired fence or trellis system, the maintenance of the structure of the grape vine in this supporting object is very, very important.


Keeping any grape vine in shape is impossible without pruning a grape vine during the dormant season.  There is also something known as “summer pruning a grape vine”, which I will explain how to do in a later article. 


Pruning a grape vine and keeping the cordon (arms) of the grape vine in shape, will not only allow sunlight to penetrate the vine, which on the other hand is needed for disease control and fruit ripening, but will also make future pruning, a breeze.


I hope you catch my drift with this “pruning a grape vine” article.  Without pruning a grape vine, or let me say, proper pruning, you will most likely fail to have great quantity and quality grapes.

Learn the art of pruning a grape vine right now!

Join The Complete Grape Growing System Today!

pruning a grape vine

The Complete Grape Growing System is an online product where you can download all the information about growing grapes.  Read more on this page

Growing Grapes – Grape Bunch Sizing

Bunch Sizing for grape vines:

With this article, I will discuss an important part of preparing the grape bunches for harvest and its called bunch sizing.  We are about 3 weeks away from starting to pack our first Flame Seedless grapes, and although we had a hard time thinning out the bunches, the crop size an quality at this stage is excellent.

Bunch sizing, as mentioned before, is an import part of preparing your grape crop for harvest.  This is not so vital for wine grapes, but for table or eating grapes it is absolutely imperative that you know how to do bunch sizing and when to do bunch sizing.

As we are entering the final stages of berry development, just before coloring, the berry sets out about two thirds of the final size.  Off course this means that during this stage, you must know exactly what to do, to maximize the berry size, and one of the methods you should consider is to make the bunches smaller.

Not only will bunch sizing improve berry size, but will also improve coloring, disease control and also makes the harvesting and handling (packing) of the grapes bunches much easier.

If you look at the picture below, you will see a variety called Sundance Seedless.  This is an early/mid season, white seedless variety that naturally produce large bunches.  If we do no do proper bunch sizing, the bunches will weigh in access of 1.2 kg and the berry size on these grapes will most probably end up being 13 to 17 mm.

Bunch Sizing Pictures

Growing Grapes - Bunch Sizing

By just doing proper bunch sizing, we actually decrease the crop size, but will increase the berry size.  Hopefully, if everything goes as planned, the size of the bunches in the picture below, will around 600 to 800 grams, making it much easier to pack into cartons and also to handle.  An increase in berry size will increase bunch weight and all-over export quality.

Growing Grapes - Bunch Sizing

The actual size of the bunch above is just larger than the width of my hand.  Some varieties like Red Globe, Thompson Seedless (Sultana), we size the bunches even smaller.  I use this method of bunch sizing to size my Flame Seedless and Crimson Seedless bunches as well

The best advice I can give you on bunch sizing is to experiment with your own variety to find the size that suites your needs.  A rule of thumb for bunch sizing is to use the width of your hand and ad about an inch.

Bunch sizing will help you produce the best grapes in the neighborhood and make your neighbor envy your grape vine!  🙂

If you need a COMPLETE proven system to help you succeed, then join the Complete Grape Growing System right now – CLICK HERE

Take care and happy grape growing my friend.

Danie

www.my-grape-vine.com

To Learn Even More About Growing Grapes,

Join The Complete Grape Growing System Today!

bunch sizing

The Complete Grape Growing System is an online product.

For a once-off payment of only $29, you get instant access to all the grape growing info you need to succeed.

Layering a grape vine – update.

Those of you who were subscribed to My Grape Vine a year ago, will probably remember the article I wrote on the 30th of September 2008, about layering a grape vine – where you take a cane from an existing grape vine, to establish a new one.

This is a neat little trick you can use, if you are trying to get a new grape vine growing in an established vineyard, which by the way is not easy to do.  Why?  Remember that the older grape vines will over-shade the young vine and preventing proper sunlight to reach the vine.  The root system of an established vine, will have reached deep into the soil by now looking for food and water.  Therefore, the watering or irrigation of an established vineyard differ from that of a newly planted vineyard, so you will have to give the young vines water on it’s own – for the home grape grower, this is fine, but if you have a farm full of grapes, this is practically impossible.

For those of you who didn’t read the article back then, here is the link:  http://www.my-grape-vine.com/blog/layering-grape-vines/ (this link will open in a new window)

With this article, I want to give you an update on how that specific grape vine is doing.  Never mind the weeds, it was sprayed yesterday  LOL :-).

In the picture below, you can clearly see the cane coming from the established vine, going into the ground and then up again.  Notice how well the new vine developed and that I started to create the frame work already.  Yes this was done in one single year using the training methods I teach in the Complete Grape Growing System!

An added bonus is, that I will be picking a few bunches of grapes from this grape vine as well!  You can see these bunches are still small , but I promise they will be worth picking in about 2 months time.

I will keep you updated as the season progress, to see what the grape look like in the end – hold your thumbs! 🙂

Take care

Danie

www.my-grape-vine.com

Wouldn’t you also like to get these results?

Then Secure Your Membership To The Complete Grape Growing System Right Now for only S29

For only $29, you get instant access to all the grape growing information you need, PLUS get some bonus videos of how to prune and train a grape vine.  The Complete Grape Growing System is a digital product.  You will not receive any physical products.

What are those numbers on a fertilizer package?

Suzana, one of the first members of My Grape Vine, send me this question a few days ago.

She wanted to know what those numbers on a fertilizer packaging means.

With this article, I will show exactly what they mean and how you can calculate, precisely how much of a certain fertilizer mixture you must apply, in order to get the right amount of an element in your soil.

The numbers on a fertilizer mix like for example a 10:10:10 fertilizer, probably the most common of all, means:

10 : 10: 10

N  :  P :  K

10 parts nitrogen (N), 10 parts phosphorus (P), 10 parts potassium (K)


But that’s not all!  On many fertilizer packages you see a 4th number in brackets; for example

2:3:4 (27)


From what we have just learned, we will have


2 parts nitrogen (N),  3 parts phosphorus (P),4 parts potassium (K)


The fourth number (27) – in brackets – is the total percentage (%) of nutrients in the mixture.  

So we have a total of 9 parts ( 2 + 3 + 4) nutrients in that mixture, that ads up to 27% of the total mixture.


In other words; for every 100 kg of fertiliser there will be a total 27 kg N, P, K in the mixture.

                                            2          27

the nitrogen (N) is                  9   x     1      =   6     kg N for every 100 kg of fertilizer mixture


Therefore, two ninths of 27 kg, or 6 kg, of every 100 kg of mixture will be nitrogen.


As for a 1:0:0(40) mixture, 40 kg Nitrogen will be added to the soil for 100kg fertilizer and no P, K


I hope this makes sense? 🙂

With this formula, you can easily calculate how much of a certain fertilizer mix you must apply to add a certain amount of N:P:K to the soil.

To Learn Even More About Growing Grapes,

Join The Complete Grape Growing System Today!

For a once-off fee of only $29, you get instant access to all the grape growing info I use on my own farm, plus some bonus pruning and training videos!

The Complete Grape Growing System is an online product.  You will NOT receive any physical products with your order

What To Do In Winter On A Grape Farm

31 October not only means Halloween for people from the USA, but means the end of the growing season for most grape growers in the Northern Hemisphere as well.


This brings us to a question I received after yesterdays blog post.  Tracy asked if we are on vacation the whole winter, because the grape vines are dormant!

LOL, if only it was true!

No, there are some important things that need to be done during the dormant season.  With this article, I will try to give you an overview of what to do when you finished harvesting your grapes.

As soon as you have picked your grapes, it’s time for a post-harvest fertilizer application.  Post-harvest fertilization is really important.  Although the grape vines will soon go dormant, it still actively takes up food and water, until the average temperature drops below the point where vegetative growth completely stops.

During this period, the grape vine stores nutrients in the canes, stem and roots of the vine in preparation for winter – the term we use is hardening off.

Not only are the grape vines preparing for winter, but the energy that is stored inside the vines, will be used for when next spring arrives.  When a grape vine starts to break bud, very little food and nutrient uptake takes place, instead, the energy stored inside the vine is used to feed the new shoots.  As a rule of thumb, about 20kg nitrogen per hectare should be enough.

The grape vines will start loosing it’s leaves, but before this happens, we normally spray a contact fungus control product, to kill all fungus spores that may still be on the grape vines.  Remember, these fungus spores can over-winter on the grape vines.

If your winter conditions allow you to, now is the time to prepare the soil for new vineyards or cut off old grape vines that needs to be replaced.  If you are a commercial grape grower, it’s a good practice to take soil samples before the snow comes, as this will tell you what is needed inside the soil before you actually rip or plough the land.

Once this is done, we start repairing trellis systems.  The growing season and while harvesting the grapes, is an extremely busy time on a grape farm.  Little time is available for maintenance and general welfare of the trellises and the rest of the farm.

Off course, dormant season means pruning season as well.  Depending on your climate, you will start pruning once the vines are fully dormant.  In very cold climates, we wait until just before spring.

Prepare you planting site well before spring, as you want to plant your grape vines before spring actually arrives.

Yes, during winter, everything on a grape farm slows down, but never comes to a standstill! 

Why aren’t there any grapes on my grape vines?

At least one out of every ten emails I receive, has something to do with either “no grapes on a grape vine”, or “too small berries”, or “not enough grapes”.

This is for sure the most common question asked by new grape growers.  Unfortunately, it is on the most difficult to answer as well, because there are a couple of reasons why this happens.  I’ll try my best to give you some tips on how you can improve the fruitfulness of your grape vines.

The first and most important thing you should always remember;

A grape vine needs proper sunlight to initiate the development of flower clusters inside the buds.  When you look at a the green shoot of a grape vine, you will see hundreds of buds situated between the leafstalk and the shoot itself.


The grape vine bud is actually a compound bud, with a primary, secondary and tertiary bud situated next to each other.


Generally, the primary bud contains leaf and bunch primordia that produce 6-10 leaves and two bunches, respectively. If the primary bud develops into a new shoot in spring, the secondary and tertiary buds remain small.  Anything that cause the primary bud to under develop or die, is what we call Primary Bud Necroses (PBM) and will greatly influence how many grapes your grape vines will produce.


Have no clue what I have just said?  Right, let me explain in laymen’s terms.


The green shoot with buds shown in the picture above, is one-year-old growth from the current growing season.  These buds will produce shoots in next years growing season.  In other words, the small shoots and bunches that will appear next year, is initiated inside the buds during the current growing season.

The following pictures shows a bud on a shoot that is starting to go dormant.  This bud will produce grapes next year.


So, if your grape vine grows in the shade, or is too compact, and no sunlight can penetrate the canopy, then next years crop will be lighter.  That is why I always keep hammering on proper canopy management and choosing the right spot to grow your grape vines.

One of Crimson Seedless vineyards is situated close to my garden.  On average, the grape vine closest to the garden, produce only half the number of bunches it is suppose to have because of an over shading tree that grows in my garden.

Incorrect Pruning Methods

I didn’t mention this first, but it is just as important as having proper sunlight penetration into the grape vines.

Remember, the fruitfulness of varieties differ, that is why some grape varieties are pruned with spurs and some pruned with canes.  The buds on variety like Crimson, initiate flower clusters from the 4th bud onwards (counting from the base of the shoot).  If you prune the dormant cane back to 2 or 3 buds, you remove the most fruitful part of the cane where most of the grapes are!

I’ve seen pictures of grape growers, who prune almost all of the previous growing season’s growth away.  Remember, without properly planning your pruning actions and by simply pruning everything away, you will reduce the crop size.

Too vigorous growing grape vines

Over fertilization or a too vigorous growing grape vine, will cause problems in the blooming stages.  Just like any other plant with flowers, the grape vine produce flowers as well, that needs to be pollinated to reproduce – the basic instinct of the grape vine is to survive and reproduce new grape vines.

If your grape vine grows too vigorous, the vine will get the “message” , “Okay, I’m doing fine, so there is no need for too many grapes!”.  The grape vine then shed flowers to make the crop lighter – not what YOU want isn’t it?

Another problem with a too vigorous growing grape vine, is sunlight penetration into the vine – mentioned above.

Diseases

Not only will diseases like powdery mildew and botrytis attack flower clusters, causing the flowers to abort, but there are mites that attack the buds on the grape vine themselves.  Rust mites feed predominantly in the outer bud scales and bud mites feed on internal bud tissue, causing damage to the small flower clusters inside the buds.

The use of Gibberellic acid (GA3)

Gibberellic acids are naturally produced plant growth hormones that affect cell division and cell elongation in stems and leaves. Commercial grape growers use GA3 to increase berry size and also for thinning out of bunches with varieties like, Thompson Seedless, Flame Seedless and many more.

Unfortunately, GA3 cause unfruitfulness to the grape vines, so proper use of this product is of the utmost importance.

Male grape vines

Most of the commercial grape varieties grown these days, produce male and female flowers, so no cross pollination is needed.

However, some grape species like vitis Reparia, produce only male flowers.  For the average grape grower, this looks promising during flowering, as they produce literally thousands of flower clusters, but these flowers will never produce grapes, they will only fall off.

Some nurseries sell these grape vines to people who wants to cover a pergola for the beauty of it alone, and not for grapes.  If you bought a house with a grape vine on a pergola or fence, that doesn’t produce grapes, then the chances are good that it is a male grape vine.

If your grape vine produce no grapes, then I do hope that this article gave you some insight on how you can correct the problem.

Remember, correct pruning and canopy management is crucial!


Take care,

Danie

www.my-grape-vine.com


Was this helpful.  Now learn how to grow your grape vine the correct way.

For only $29, you get instant access to all the grape growing information you need, PLUS get some bonus videos of how to prune and train a grape vine.  The Complete Grape Growing System is a digital product.  You will not receive any physical products.


Controlling Powdery Mildew On Grapes

Powdery mildew is the main fungal disease that most grape growers confront every seasons.   The fungus that cause powdery mildew is called Uncinula Necator.

Many grape growers struggled to keep powdery mildew under control in vineyards, as once your vines are infected and the symptoms are visible, the disease already is in an advance stage of development.

The symptoms are visible on all green parts of the grape vine.

On the berries:

A white powdery substance covers the berries – it looks like a white dust that can be rubbed off.  These “dust” particles are the actual spores of the powdery mildew fungus.  Infected berries will have what appears to be a net-like pattern when the “dust” is rubbed off with your finger.  They most probably will crack open and dry up.  If the infection takes place early and the fungus disease spreads too fast, it can cause total crop loss!

Berries are extremely susceptible from the immediate pre-bloom stage through fruit set.  This is the most critical time to keep powdery mildew under control.  Severe powdery mildew infections on the clusters is usually a result of poor fungus control and canopy management throughout this period.

On the canes (in the dormant season), you can see old infections because they will show up as brown areas. As the fungus grows on the grapes and vines and begins to produce spores you will see that the tissue that is infected with have an ash grey powdery look.

On green shoots, the same powdery “dust” will be visible.  The fungus will infect the green tissue, and will reduce photosynthesis and overall grape vine vigor.

On the leaves:

Powdery mildew on the leaves of a grape vine, appear as a white dust on the upper and lower part of the leaves.  With severe infections, discoloration and drying out of the leaves are visible.  No need to say how bad this is for berry size, sugar development and overall growth of the vine!

I often get emails asking about continuous powdery mildew infections, year after year.  There is only one explanation for this – the fungus spores over-winter on the grape vine and in the following growing season, once the conditions for inoculation is ideal, the infection will start again.  As you can imagine, this is a vicious circle, that will give you many headaches!

What is the ideal conditions for the inoculation?

For the powdery mildew, fungus to develop and spread there needs to be free water (from rain, over-head irrigation and even high humidity) and heat.  Spore cells, or cleistothecia overwinter within cracks in the bark of the vine and when rains of approximately 0.1 inch (10 mm) or more occur in spring, and if temperatures are at least 50 °F (10° C), these spores are released and will infect the nearby leaves, canes and bunches.  The higher the temperature, the more spores will be released.  The optimum temperature is mid 80s ° F or mid 20s ° C and higher is the optimum temperature for high spore release.  When the temperature reach the high 90s (+30’s ° C), the development or spread of powdery mildew will be restricted.

Controlling Powdery Mildew:

Chemical control:  With the wide range of fungicides now registered for use on vines, the question arises as to which is best and when is the most appropriate time to apply.  Where powdery mildew control is poor this is usually due to inadequate spray  coverage or the interval between sprays being too long rather than reduced fungicide efficacy.

As said earlier, grape berries are most susceptible to powdery mildew during the period from just before flowering to 4 to 5 weeks after fruit set, and failure to control the disease during this period can result in serious crop loss.  The best control is achieved by applying a fungicide with an active ingredient called strobilurin or DMI fungicides during this period.

Organically:  Controlling Powdery Mildew organically is much harder.  The most important point to remember is that moisture and heat is needed for the fungus to spread.

Maintaining proper airflow and sunlight penetration into the vine will ensure a “drier” micro climate inside the vine.  Direct contact with sunlight will also kill powdery mildew spores and reduce the chances of crop loss.  This can be achieved with good canopy management (suckering, leave pulling, tying of shoots, removing of water shoots etc. (consult the Complete Grape Growing System for details, it’s all there!).

I hope this article will help you solve Powdery Mildew problems on your grapes.

Remember:  Maintain a proper canopy, keep your spray applications up to date and be on the look-out for the symptoms I’ve shown you.

Take care

Danie (The Grape Guy)

www.my-grape-vine.com


Was this helpful.  Now learn how to grow your grape vine the correct way.

For only $29, you get instant access to all the grape growing information you need, PLUS get some bonus videos of how to prune and train a grape vine.  The Complete Grape Growing System is a digital product.  You will not receive any physical products.


Speaking The Grape Vine Language

I often receive question from new grape growers to explain the terminology I use in my articles.  After reading this, I hope you will be able to picture or identify all the different parts of the grape vine.


Cuttings or grafted cuttings: 
A grape vine cutting, is a small piece of wood (4 to 12 buds in length), that was pruned from an existing grape vine, in order to propagate a new grape vine. 

Cuttings can also be grafted onto what we call rootstock grape varieties.  These varieties a purely bred for this purpose.   Some grape varieties are more susceptible to diseases and these rootstock varieties are selected from material that proved to be more resistant to disease found in the soil.  Grape growers use certain rootstock when they pH imbalanced soil, too wet soil and even for stronger growth, when the grafted variety has known growing problems. 

Taking cuttings from an existing grape vine should be done after winter, just before the first signs of bud swell close to spring.

Cuttings are taken from the shoots that hardened off and lost all of it’s leafs, during winter (which we now call canes). 

This picture shows grafted cuttings.  The graft union, where the rootstock and grafted variety is joined, is clearly visible.

Shoots and Canes: 

A shoot is the green, one-year-old, growth from buds on a grape vine.  A shoot normally develops from spurs and canes (later described) that was pruned during the winter.


A shoot that is starting to devlop from a spur.

Sometimes, shoots also develop from two-year and older wood; these shoots are called water shoots and normally do not produce grapes.

After harvesting the crop, the grape vine will go dormant as winter comes along and the temperatures start to drop below the point where vegetative growth stops and the grape vine starts to prepare for the cold winter.  The leafs will fall off, and the green shoot, will gradually become a more woody, brown shoot.  At this stage, we call these shoots canes.  

Spurs:

A grape vine spur, or also known as a short bearer, is a cane that is pruned during the dormant season.  These spurs are the fruit bearers for coming season, and also to renew the grape vine.  A spur is pruned to 2 buds in length.

Cane bearers:

As with a spur or short bearer, some less fruitful varieties are pruned with cane bearers.  A cane bearer (or cane), is pruned back 8 to 12 buds long and tied to the trellis wires.

Buds (1 on the picture):

Are undeveloped shoots, located a shoot or cane.  This is the production area, where new shoots develop and every single bud of a grape vine, is actually three buds combined (composite bud).

Basilar buds (2 on the picture):

A basilar bud, is a bud at the bottom of a spur or cane bearer.  These buds are on old pruning wounds or the frame work of the grape vine and are not counted, when deciding on many buds to leave on a spur or cane.

Canopy:

The canopy of a grape vine is simple word for the area where the leaves and the fruit are.  The canopy is developed on some kind of trellis system, constructed by the grape grower.  Managing the canopy growth is critical and of the utmost importance for ANY grape grower – backyard grape grower and commercial grape grower.  The canopy is where new canes and spurs are pruned in dormant season.

Lateral shoots (laterals):

A lateral shoot is a “side shoot”, that develop from a bud on a green shoot, one-year-old shoot.  When training a grape vine, these shoots use nutrients needed for young grape vine to reach the trellis wires, and should be removed according to the training methods I teach.

On the other hand, once the training shoot reach the trellis wires, these laterals are used to construct the cordon or arms of the grape vine (see next explination).  Once these lateral shoots become during the winter, they are pruned and tied on the trellis wire where the cordons will be developed. 

This will form the basic structure from where all pruning will be done in the future.  You need to ensure you develop the cordon (arms) the correct way and in the right position to ensure easy pruning and canopy management in the future – REMEMBER, this is extremely important!


Cordon, structure or the frame work of the grape vine:

The arms, or cordons of a grape vine is a two-year and older permanent framework of a grape vine.  Spurs and cane bearers are pruned on this framework.  The framework is developed needs to be kept under control, to ensure a proper harvest, and is sometimes pruned back to the main stem of the grape vine.  This is what we call renewal pruning (from a renewal spur, close the stem of the vine).


Was this helpful.  Now learn how to grow your grape vine the correct way.

For only $29, you get instant access to all the grape growing information you need, PLUS get some bonus videos of how to prune and train a grape vine.

The Complete Grape Growing System is a digital product.  You will not receive any physical products.


Protecting Young Grape Vines From Weed-killers

With this article, I want to show you how you can protect your young grape vines, while spraying weed-killer.

But before we move on:

  • Remember that weed-killer can be harmful.
  • Take note of what weed-killer you use, (contact or systematic)
  • Use properly maintained and calibrated spray equipment
  • Read the instructions on the container label,
  • Ensure that you will not contaminate primary water and food sources
  • Use protective clothing.

With that said …

Weeds are the number one enemy for any young grape vine and we all know that, taking care of unwanted weeds in a newly planted vineyard, can be headache.

If you allow the young grape vine to come in contact with the weed-killer you spray, it will also die or get badly damaged.  The fact remains; we still need to control weeds in newly planted vineyards- period!

Easier said than done, isn’t it!

However, there are a few tricks I will show you how to protect your grape vines while spraying weed-killer.

The first and probably the most important thing to remember, is to kill the weeds before you plant your grape vines.  This will ensure that for the first couple of weeks, your vineyard and young grape vines, will grow without competition for food and water.

However; as the growing season progress, the weeds will start to grow again and this is where the problems start.  With your new vines well established, you cannot simply go out and spray weed-killer again; you need to protect the young grape vines first.

If you grow grapes on small scale, you can simply protect the vines by covering it with a plastic carry-bag, while you spray the weed-killer.  Ensure that the outside of the bag (the area where the weed-killer came in contact with the bag), never touch the vegetative growth of the young grape vine.

The problem starts when you grow grapes on a larger scale.  It is simply impossible to cover every single grape vine with a bag, unless you have the these:

These are called trunk protecting tubes.  Normal growing tubes can also be used, but I personally don’t fancy the use of growing tubes, especially if you are going to leave them on the grape vines.  In our climate, I found that the micro-climate inside the tube, often gets too hot or humid and may damage the foliage or could lead to unwanted diseases.

Once the grape vines are planted and pruned back as described in the Complete Grape Growing System, you simply cut a tube of about 500 to 700mm in length.  Fold the tube into a small circle, that will go around the cutting.  When placing the tube over the cutting, ensure not to damage any buds and new shoots that may have developed from the cutting.

After you have placed the tubes at the base of the cutting, you can tie your training strings to the bottom trellis wire.

When it is time for the weed-killer application, later on in the season, you simply unfold or extract the tube to it’s full length.

Once the spray application is complete, you need to wait a few hours for the weed-killer to dry off, and then again you fold down the tube into a circle and again place it at the base of the cutting.

You can also use plastic covers to keep the weeds away from the cuttings, but I will discuss this in more detail in another blog post.

Neat little trick, isn’t it?

Take care, and happy grape growing…

Danie

www.my-grape-vine.com


Did you like this tip?  The Complete Grape Growing System has many more!


For only $29, you get instant access to all the grape growing information you need, PLUS get some bonus videos of how to prune and train a grape vine.

The Complete Grape Growing System is a digital product.  You will not receive any physical products.

Will pruning a grape vine earlier, advance bud break?

Being working online and offline with thousands of vineyard owners from all over the world, the past four years, I know that this question still remains a mystery.  Well, I’m about to show you proof that early pruning will for sure influence the time of bud break.

During the past dormant season, we started pruning before my staff took their annual vacation.  We stopped pruning one of my Flame Seedless vineyards, halfway through the vineyard, when it was time for them to take their vacation.  After two weeks, we came back and pruned the rest of the vineyard, as well as the rest of my farm.

Now from the pictures below, you can clearly see that the grape vines in the section we pruned two weeks earlier, have develop more leaves and that the shoot length is much longer.

Why?

The buds at the tip of the canes come out of dormancy first.  This is the point where all the enzymes are transported to, as the sap flow in the vine increase.  Obviously, if there are less buds on the cane, more enzymes are available per bud and therefore, the buds will break earlier.

 Early pruning will not necessarily advance the harvest date.  The later vines will catch up, as the season progress, but one thing is for sure; it absolutely does advance bud break.  This is extremely important to know, if you live in a climate where early spring frost is a problem.  If you prune your grape vine too early, your grape vines will break bud too early and will increase the chance of frost damage.

Now the question remains: “When is the best time to prune a grape vine?”  A rule of thumb is, to prune just before natural bud break, but this isn’t always feasible if you have acres of grape vines.   You need to know when bud break occurs in each of the vineyards or on each of your grape vines.  Each year, write down the dates of bud break, as this will give you more or less an idea of when you can expect it next year.  Although the annual climate, snowfall, rain and so on, will influence the actual date of bud break, it will give you more or less an idea of when this will happen.

On the other hand, pruning too late, also has it disadvantages.  If you start pruning too late (after bud bread), you will damage the cracked buds, and new shoots that developed.  If you damage the bud, the secondary bud will have to break to reveal a new shoot, and this will influence your crop size.

Remember; after pruning, the canes are twisted and secured around the trellis wires.  If there are small shoots and cracked buds on this cane, you will damage them, no matter how careful you work.

To sum up this article:

  • Early pruning does advance bud break, but not necessarily harvest date
  • Do not prune too early if your location is known for heavy spring frost
  • Write down the dates of bud break so you will know when to expect it
  • Do not prune too late as well, as the chances of you damaging the buds and shoots is much higher.

Know you vineyard, know your climate and you will know when to prune.

Good luck and hopefully this article shed some light on the correct pruning date for your vineyard.

Danie

www.my-grape-vine.com


Pruning your grape vine is one of the most important aspects of growing a grape vine the correct way.  Learn how, with the Complete Grape Growing System.


For only $29, you get instant access to all the grape growing information you need, PLUS get some bonus videos of how to prune and train a grape vine.

The Complete Grape Growing System is a digital product.  You will not receive any physical products.

 Page 2 of 9 « 1  2  3  4  5 » ...  Last »