Pruning Grapes – Sherman’s Vineyard
Pruning grapes is not that hard!
If you train your grape vine the correct way from day one, then it will make the task of pruning grapes much easier.
With this article, I will proof to you that pruning grapes is easy and will also show you the correct way of pruning grapes on an arbor or pergola.
I received the following email from Sherman:
Pruning Grapes On An Arbor

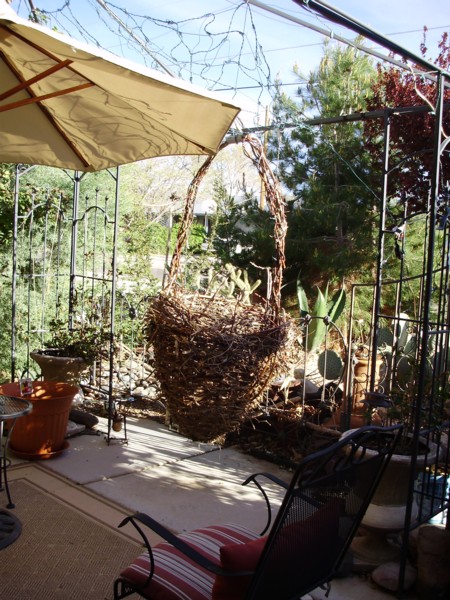
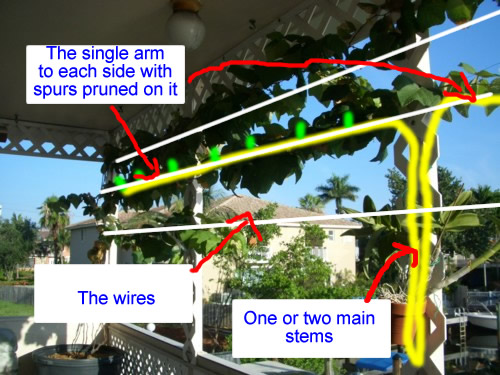
Hi there, Attached is a photo of my vine structure. In the photo, the red line represents the stem from the ground to the wire, the yellow lines represent the 2 arms that forked off from the stem, and from the yellow lines (arms) there are several vines that extend out from the fence. I would like to know if and where I should prune the vines as it is getting close to spring. – Should I not prune and leave as it is in the photo?
– Should I prune back to the arms that run along the fence? This will leave the red and yellow lines.If you need more information, please ask I hope going by the photo I am doing things right, fingers crossed 🙂Thanks in advance
Sherman (member of the Complete Grape Growing System)
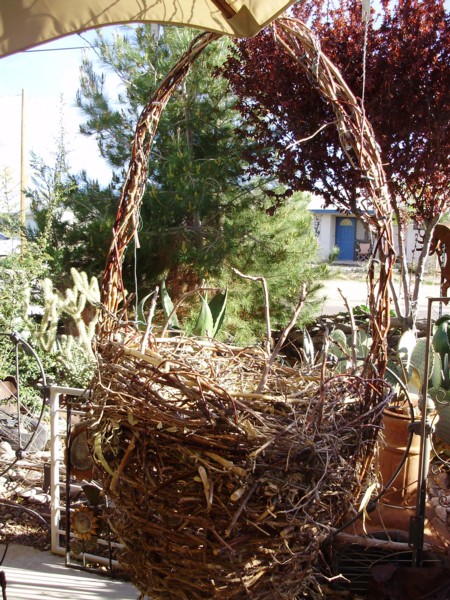
First of all; Sherman you did a great job training the grape vine on the arbor – well done. From the picture, you guys can see how he developed the horizontal arm first and then used the laterals to cover the canopy of the arbor. For those of you who didn’t watch the video about training a grape vine on an arbor, should do it before reading on – here’s the link (it will open in a new window) http://www.my-grape-vine.com/blog/growing-grapes-on-a-pergola
Okay, so let’s get down to business and discuss Sherman’s questions about pruning grapes.
The first thing you need to understand is that pruning grapes the correct way, is one of the key elements to your success. Without properly pruning grapes, the grape vine will not produce the desired crop and will most probably not cover the arbor the way you like. I’ve seen this many times in my 20+ years since I started growing grapes. One of the biggest mistakes I see with pruning grapes, is that new grape growers are afraid to prune hard (as is Sherman).
To properly structure a grape vine, you need to “force” the grape vine to grow the way you want it to and the only way to do that is to train the grape vine during the growing season and to prune it during the dormant season. When pruning grapes that are older that 4 years, you will remove between 70% – 90% of the previous year’s wood!
If we look at Sherman’s grape vine, you will see that he trained the grape vine with a trunk (vertical) and two arms to each side (along the width of the arbor) – he did a great job doing that, didn’t he? From the horizontal arms, lateral shoots developed which he trained on the trellis wires that cover the arbor.


Now if Sherman wants to do this right, he will have to remove some of the lateral canes on the arbor, otherwise his canopy will be very compact the coming growing season which can lead to diseases, unfruitfulness and will make summer manipulations (suckering, leave pulling etc.) much harder.
There are normally two reasons why we grow grapes on an arbor:
- to provide shade and to look good (on a stoop)
- for the grapes
In Sherman’s case, I think it is both, so we will prune the grape vine to cover the pergola (which will look nice in summer) and to have some grapes as well.
To do that we will develop the structure of the vine like this.

Pruning grapes:
On the horizontal arms, we will prune some renewal spurs which can be used to renew the grape vine in the future. In other words; we will prune some of the canes back to two buds (like explained in the Complete Grape Growing System and in the pruning grapes article on my blog) The red lines represent the canes that will cover the canopy. Each of these canes (red lines) should be spaced more or less 20 inches apart. This will ensure that the new growth will cover the whole canopy with enough space or room for lateral growth.
When you look at the arbor from above, it should look something like this:

If possible, the length of the canes should be long enough to reach the second last horizontal wire of the arbor. If the canes are not long enough, then prune it back to where the diameter of the cane is the same as size of a pencil.
I hope this will help some of you to prune grapes the correct way. Remember; pruning grapes and training grapes is very important.
Take care and good luck! 🙂
Danie
www.my-grape-vine.com
Let me take you by the hand and walk you through every step of growing and pruning grapes.
Join the Complete Grape Growing System Today


 To sum this up: