Growing Grapes – Jaques’ vineyard
Hi grape growing friends.
It’s been a while since I posted on my blog, because I took a short break after the harvest season. Well, I’m back with some new posts and some new tips on growing grapes.
Those of you who have followed my blog posts since last year, will remember that I uploaded some pictures of Jacques’ grape vines in 2009. With the help of the Complete Grape Growing System, Jacques established a beautiful wineyard in his backyard – one he can be proud of.
A week or two ago, he send me some more pictures of what the vines look like this year. The vines are still young, but you can see the amazing results he got. Here are some of the pictures from last year and this year.
Compare the pictures to one another and see what can be done!
At the end of the post, I will give you and Jacques some tips on what to do next. Enjoy …
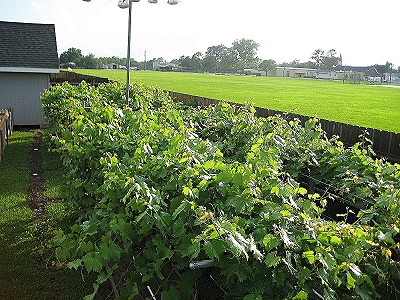
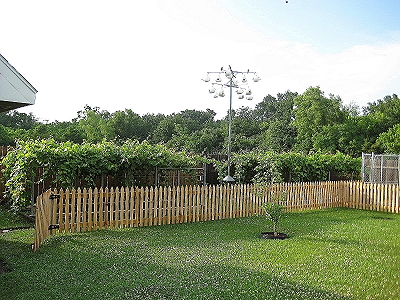
2009 Pictures
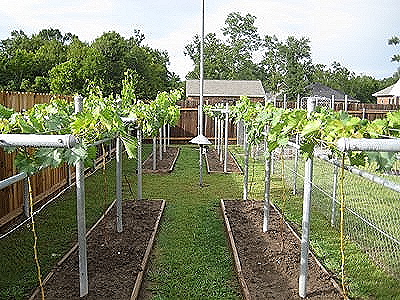
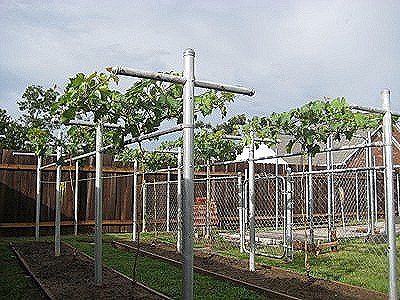
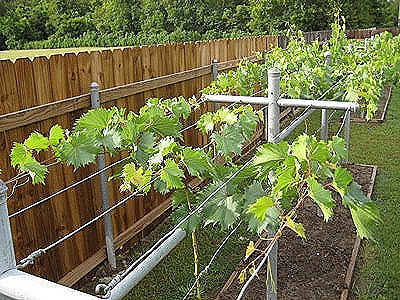
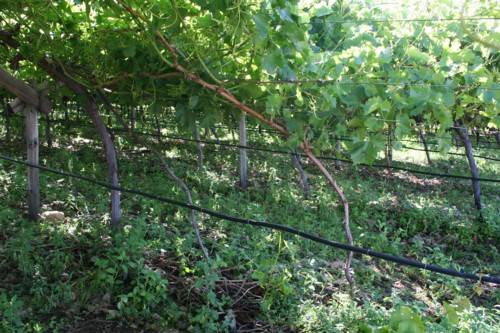
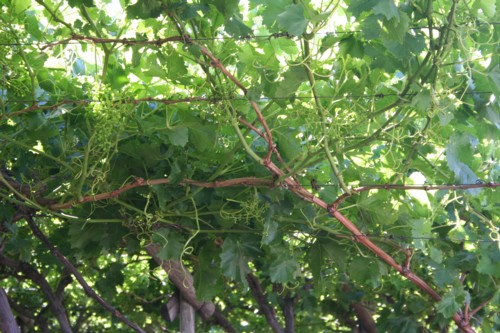
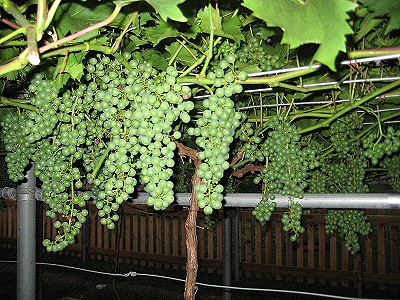
2010 Pictures
Jacques’ email to me:
Hi Danie, I wanted to send you some pictures of this year’s vines. Last year you posted my vineyard on your blog and said some very nice things about it, but there were no grapes on the vines. You did say that the grapes will come next year and you were right again. This year’s vines look nothing like last year’s vines. The season is young and the heat and rain is yet to come but for now in South East Louisiana my vines look great. I can’t wait for harvest but for now I’ll work it into the summer and look forward to the fall harvest.
Your Friend
Jacques
The Grapes!
Jacques, first of all, I must congratulate you on a job well done – the vines look great!
Now for some tips on what to do next:
-
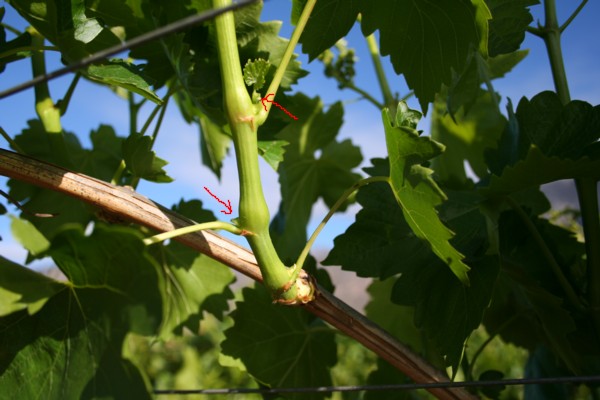
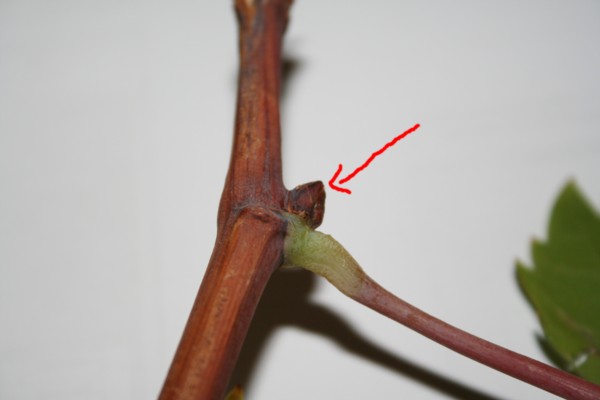
Remember what I teach in the Complete Grape Growing System; although the vines are well developed, they are still young and cannot ripen a full crop yet. Limit the number of bunches to not more thean 10 – 12 per vine. Your vines will develop the cordon (arms) this year and need enough energy to that. The bunches hanging against each other are the first ones you want to remove to ensure proper ripening.
-
Prune the canopy on the sides, where the shoots hang down, so there will be proper airflow into the vine. Those that are half way to the ground, can be pruned 8 to 9 inches from the canopy wires.
-
I see you did remove some leaves – great job, just remember that new ones will develop, so keep doing it.
-
Lastly, keep your spray program up to date, as you mentioned that the raining season is on it’s way. Downy milldew and powdery milldew is now your greatest enemy – watch out for these diseases.
Once again, great job Jacques.
For those of you have similar pictures, I will be more than glad to post them as well.
Take care and talk to you soon.
Danie – “The Grape Guy”
To get the same results as Jacques did, you need to do it right!
Let me take you by the hand and walk with you every step of the way.
Join the Complete Grape Growing System Today

The Complete Grape Growing System is an online product where you can download all the information about growing grapes. You will not receive any physical product with your order. For a once-off payment of only $29, you get instant access to all the grape growing info you need to succeed.